I bought a sgraffito pottery mug at a craft fair in Asheville about six years ago. The potter was an older guy with a salt-and-pepper beard who had a hand-calligraphy business on the side, and the mug was one of those pieces where a single line of vine had been scratched clean through the cream slip to show the dark stoneware underneath. The line was clearly imperfect. You could see where his hand had slowed down at the curve, where the stylus had pressed harder on the downstroke. I paid something like $38 for it, which felt like a lot for a mug at the time. I still have it. The line is now slightly fuzzy from two years of dishwasher use, but the carving is still visible. The mug has not chipped.
Then last year I bought a similar-looking mug from an Etsy storefront I will not name. The picture showed a beautifully carved botanical wreath on a cream background. The product description said "hand-carved sgraffito." The price was $19, free shipping, 30-day returns. When the mug arrived, the carving looked right at first glance. Then I held it up to the window and tilted it. Every single line on the mug was exactly the same depth. Not similar depth. Not "close enough" depth. Identical. The line endings were also weirdly clean — no taper, no little skip where the stylus had been picked up. I ran my thumbnail along one of the lines. It was not a carved groove. It was a slight emboss. A printed underglaze pattern, almost certainly a decal.
That is the second mug, sitting in a closet now. The first mug lives in my cabinet. Same general idea on the shelf. Completely different objects.
That gap — the gap between real sgraffito pottery and the stuff that is marketed as sgraffito pottery — is what this piece is about. It is the same kind of gap we covered in the reactive glaze chemistry guide, where roughly half the dinnerware on Amazon that claims "reactive glaze" is actually a printed underglaze pattern. Sgraffito is one of the oldest surface decoration techniques in ceramics, dating back to at least 14th-century Italian Renaissance workshops, and the modern revival is real. Walk into any craft fair, scroll Etsy, sit in on a community studio class, and you will see a lot of mugs, plates, and vases with carved-through slip designs. Some of it is the real thing. Some of it is decals, slip-trailer imitations, or laser-etched patterns that are being sold under the same word. The two look very similar on Instagram. Up close, they are not even the same craft.
I want to walk you through how sgraffito pottery actually works, the four steps a real piece goes through, the three knockoff patterns to look out for, and how sgraffito differs from the techniques people mix it up with — mishima, engobe, plain carving. By the end you should be able to look at a listing photo, a craft fair table, or your own cabinet and have a real opinion about what is in front of you.
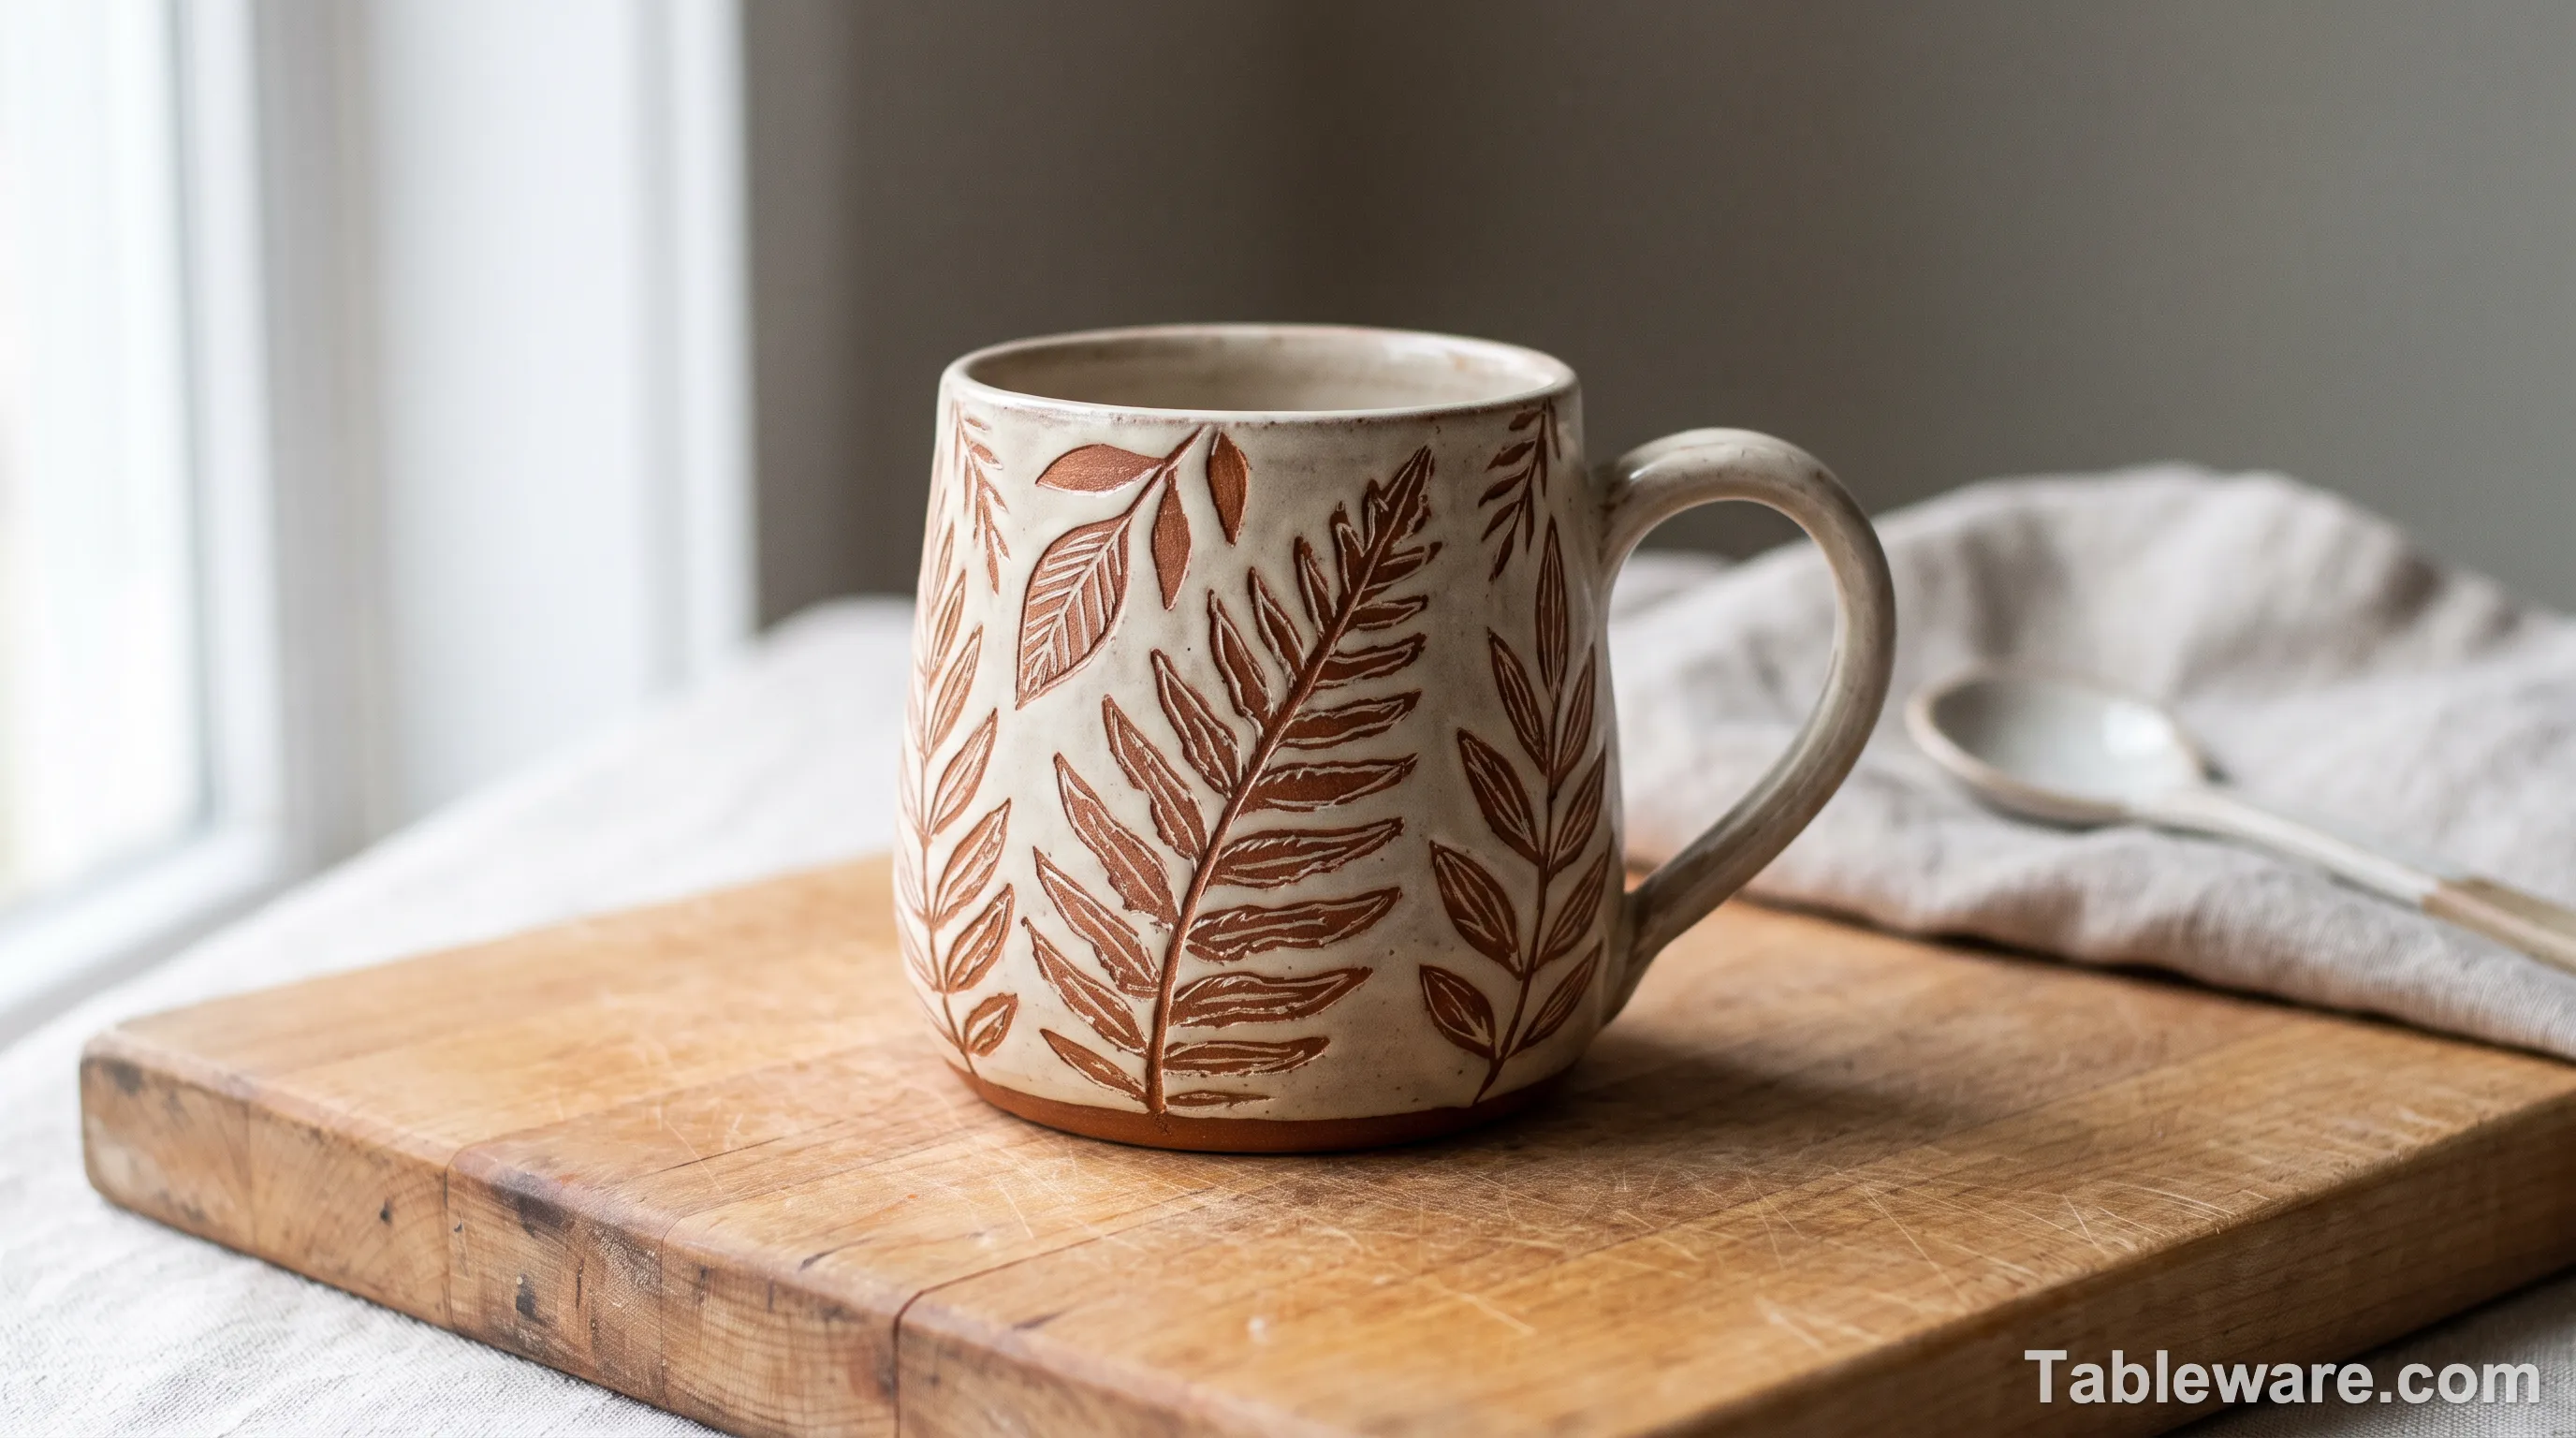
Fig 1. A real sgraffito mug. The vine is carved freehand through the slip with a metal stylus, which is why the line has slight variation in depth and the line endings taper instead of stopping clean. This is the thing everything else is trying to imitate.
What Sgraffito Pottery Actually Is
Let's start with the word. Sgraffito comes from the Italian sgraffiare — "to scratch." In its strictest ceramics sense, sgraffito is a surface decoration technique where a potter applies a layer of slip (liquid clay) or underglaze over a leather-hard or bisque-fired clay body, lets it set up to the right moisture, and then scratches a design through that top layer to expose the contrasting clay body underneath. The result is a two-tone image: the color of the slip on top, the color of the clay body beneath. That is the whole trick.
The Italian Renaissance connection is real. Sgraffito on pottery (as opposed to sgraffito on plaster walls, which is older and unrelated) shows up clearly in 15th-century Italian maiolica workshops, especially around Florence, Faenza, and Deruta. Potters would slip-trail a design in white over a dark red earthenware body, then scratch the background away to leave the white pattern raised. The same basic move. Five hundred and seventy years later, we are still doing the same basic move.
What changed is the surface. Renaissance sgraffito was almost always done on red earthenware with a white slip. Modern studio sgraffito is most often done on mid-to-dark stoneware (think brown, dark gray, black) with a white, cream, or colored slip on top. The contrast is sharper, the firing temperature is much higher (cone 6 to cone 10 instead of the low-fire earthenware range of cone 04 to cone 06), and the tools are finer — loop tools, sgraffito needles, sharpened bamboo skewers, even flexible Exacto blades for the really fine line work.
The thing that has not changed in 800 years is the core mechanic: you are cutting through a layer to reveal a layer underneath. Everything else — the slip color, the body color, the tool, the kiln — is detail.
Why people mix it up with other techniques
There are four techniques that get called sgraffito in casual conversation, and only one of them is actually sgraffito. Mishima is the Korean cousin where you incise lines into a clay body and then fill those lines with contrasting slip, so the color sits in the groove rather than being carved away. Engobe is a broader term for colored slip used as a surface coating — sgraffito uses engobe, but not all engobe work is sgraffito. Plain carving or etching is just cutting into a single clay body with no slip layer, so the carved line is the same color as everything else. And then there is the modern wash of decal, laser-etch, and printed underglaze pattern that gets sold as sgraffito because "sgraffito" sounds artisanal and the marketing team figured out the word ranks in search.
I will go through the four real techniques in more detail later, because the sgraffito-vs-mishima question is one of the most common confusions I get asked about. For now, the thing to lock in is: real sgraffito means a top layer that has been physically cut away to reveal a different layer underneath, and the cutting happened by hand with a tool. If you are comparing sgraffito technique ceramics options for a class or a home studio, sgraffito is the easiest of the four to start with, mishima is the trickiest, and engobe work is just a colored slip coating that does not count as sgraffito on its own.
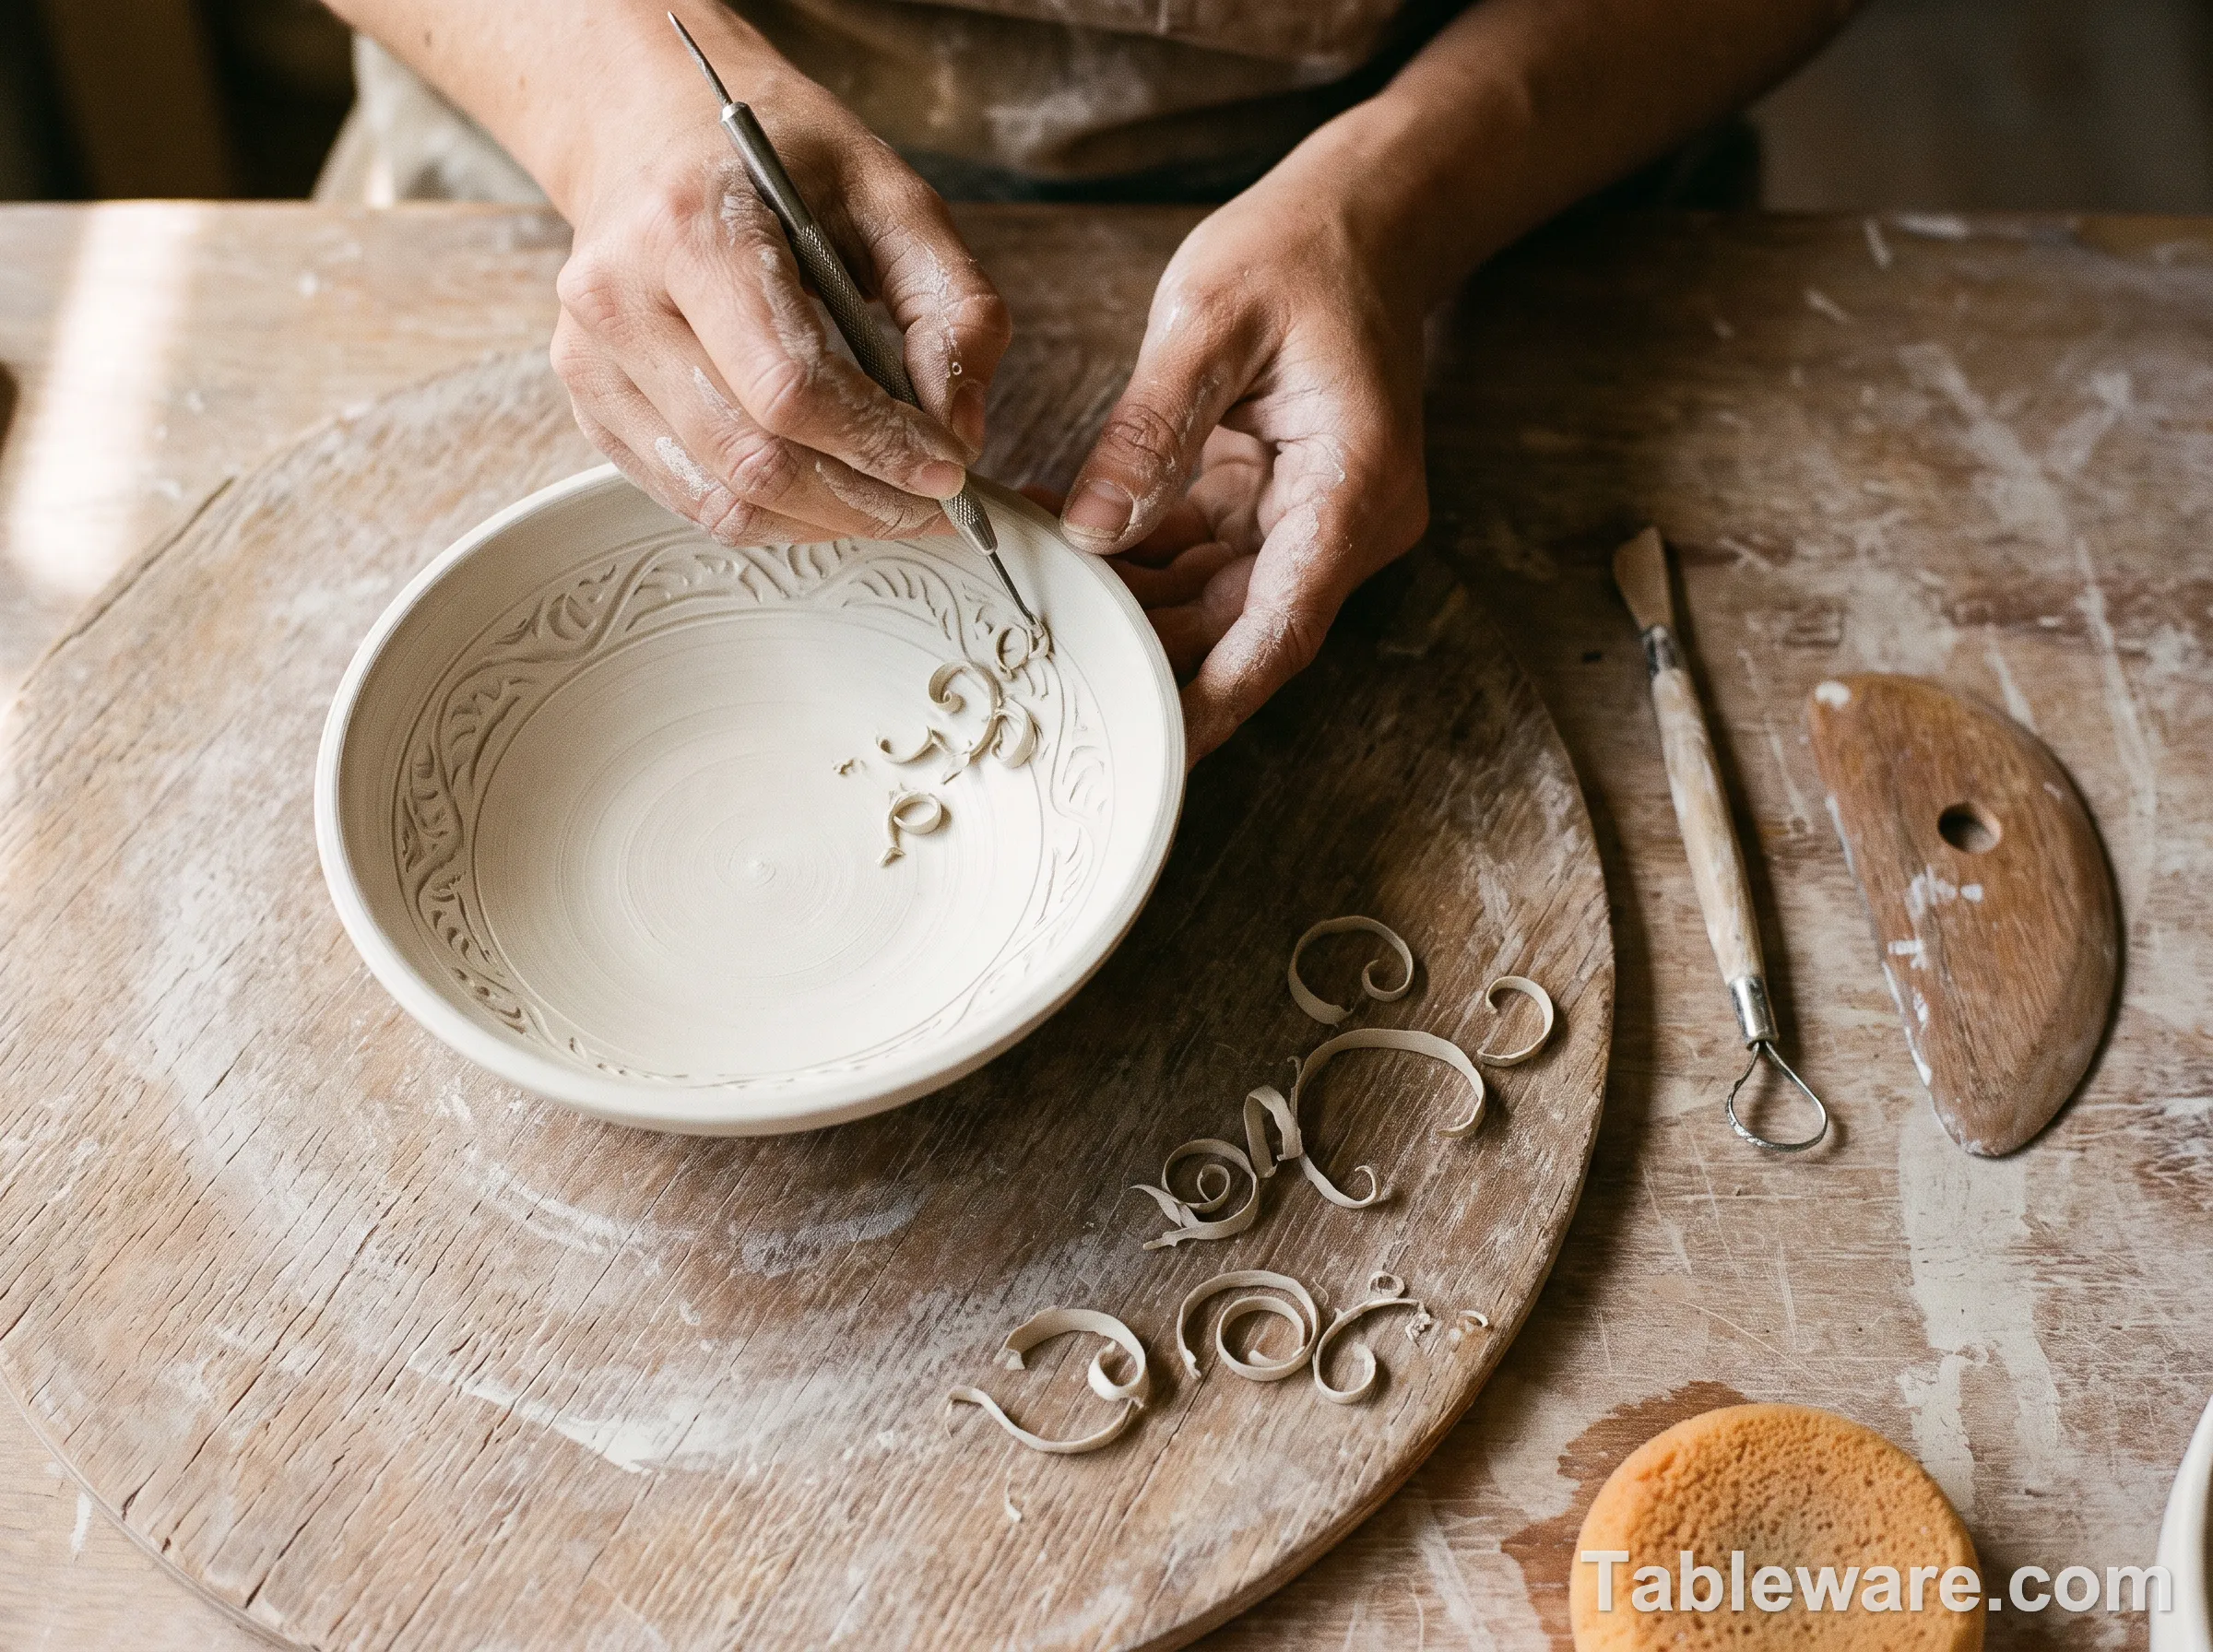
Fig 2. A sgraffito carve in progress. Notice the tiny curls of slip that have rolled up where the stylus has cut through — that is the visual signature of real carving. Slip curls are a good sign. If you do not see them in a process photo, ask why.
How to Sgraffito Pottery: The 4-Step Process
This is the part most "sgraffito" tutorials skip, because the technique looks simple in a finished photo and the actual process is fiddly in a way that nobody likes to admit. There are four steps that matter, and getting any one of them wrong means the slip layer cracks, the carving chips off in the kiln, or the design disappears under the glaze.
Step 1 — Throw, trim, and let the piece reach leather-hard
Sgraffito is almost always done at the leather-hard stage, which is the window in clay drying where the piece has stiffened up enough to handle without slumping but is still damp enough to take a mark. For stoneware that is usually 12 to 24 hours after throwing, depending on the studio humidity. The piece is bone-dry to the touch but you can still press a thumbnail in and leave a shallow dent.
If the piece is too wet, the slip layer will not bond and will slide or peel. If the piece is too dry, the slip will crack as it dries because the body underneath is shrinking faster than the slip on top. The window is narrow. Potters who do a lot of sgraffito tend to throw pieces specifically for the technique — slightly thicker walls (6 to 8 mm instead of the standard 4 to 5 mm) so the slip layer has room to shrink without cracking the body.
Step 2 — Apply the slip or underglaze layer
This is where the visual character of the finished piece is decided. The slip is usually a commercial brushing slip or a studio-mixed recipe of clay, silica, and a colorant (iron oxide for warm browns and ambers, cobalt for blue-grays, manganese for purplish browns, copper for greens). Most studio sgraffito is done with a light slip on a dark body — white on brown, cream on black, soft blue on charcoal — because the contrast makes the carving pop.
Application can be by brush, by dipping, or by trailing through a slip trailer (a syringe-like tool with a nozzle). Brushing gives the most control for detailed work but takes longer and uses more slip. Dipping is fast and gives an even coat but the slip has to be the right viscosity or it runs. Slip trailing is for very precise, raised-line work and is more of a mishima-adjacent technique. For a clean sgraffito look on a dinner plate or mug, brushing or dipping is standard.
The slip layer should be applied evenly at about 0.5 to 1.0 mm thick. Thinner and the carving cuts through to the body before you can develop a clean line. Thicker and the slip cracks on drying. The piece is then set aside to firm up — usually another 30 minutes to 2 hours, depending on the studio.
Step 3 — Carve the design with a stylus
This is the part that actually shows up in product photos, and the part that is most often faked. The carving is done with a sgraffito needle, a loop tool, a sharpened bamboo skewer, or sometimes a flexible Exacto blade. The tool is held like a pencil, the piece is braced with the other hand, and the design is scratched through the slip layer down to the body. As the tool cuts, a tiny curl of slip rolls up ahead of the point. That curl is the visual signature of real carving, and you will see it sitting on the piece when the potter is done.
Real sgraffito has visible hand variation. The line weight changes with pressure. Curves have a slight wobble. Where the potter paused to think, the line thins out. Where the stylus was lifted to skip a section, the line ends with a clean taper, not a square cut. If you look at 10 inches of carved line on a real sgraffito piece and every bit of that line is the same width and the same depth, you are looking at a decal.
The carving can be done freehand from imagination, traced from a sketch, or done through a carbon-paper transfer. All three are legitimate sgraffito. What is not legitimate is having the design produced by any kind of automated process — laser, plotter, screen print, decal — and then marketing the piece as sgraffito. We will come back to that.
Step 4 — Bisque fire, touch up, then high-fire
Once the carving is done, the piece has to dry fully (24 to 48 more hours), then go through a bisque firing — the first firing, usually to cone 04 or cone 06, which hardens the clay enough to handle but leaves it porous enough to take glaze. After the bisque, a lot of sgraffito potters do a careful touch-up pass, recarving any lines that got softened in the bisque or that picked up kiln dust.
Then the piece is glazed and high-fired. Most studio sgraffito is fired to cone 6 (around 2232°F or 1222°C) or cone 10 (around 2381°F or 1305°C), depending on the clay body. The glaze goes over everything — slip, carved lines, exposed body — and the visual result depends on whether the glaze is transparent, satin, or matte, and whether it has any color of its own. A clear transparent glaze is the most common choice because it lets the sgraffito contrast do all the visual work.
The kiln is where a lot of fake sgraffito falls apart. A printed decal that survived a bisque firing will not survive a cone 6 or cone 10 high-fire unless the decal was specifically designed for that range. Cheap decals bubble, fade, or disappear at high temperature. That is one reason real sgraffito commands a real price and decal sgraffito does not.
The 3 Knockoff Patterns and How to Spot Them
I want to be careful here. Most of the people making the knockoff pieces I am about to describe are not trying to commit fraud. They are small studios or import operations that have figured out that "sgraffito" sells, and they have applied the word to whatever they are actually doing. The marketing copy says "hand-carved" because that is the SEO term. The product is a decal because that is what scales.
That said, if you are paying sgraffito prices, you should be getting sgraffito product. Here are the three patterns I see most often.
Knockoff #1 — Laser-etched decal on a production stoneware body
This is the high-end of the knockoff spectrum and the one that fooled me on the Etsy mug. The piece is a normal slip-cast or pressed stoneware body, the surface is printed with a ceramic decal that has been laser-cut into a fine line pattern, the decal is applied under a clear glaze, and the whole thing is high-fired. From a foot away, the line work can look convincing. The giveaway is the line endings. A real sgraffito line, where the potter lifted the stylus, tapers to almost nothing. A laser-etched line just stops — square, clean, sometimes with a tiny molten bead at the end. The other giveaway is the line depth. A carved line is a groove you can feel with a thumbnail. A laser-etched line is essentially a surface discoloration, not a groove.
You will also see the same exact design repeated on every piece in a set, down to the last curl. Real sgraffito varies. Even when a potter is using a transfer or template, the carving will have small wobbles. Decals do not wobble.
Knockoff #2 — Printed underglaze pattern (the $96 Amazon set)
This is the one I called out in the reactive-glaze article. A printed underglaze is a ceramic pigment printed on a paper or polymer carrier and applied to the piece before glazing. When fired, the carrier burns away and the pigment fuses to the clay. It is a real industrial technique, used for legitimate reasons (mass production, complex multi-color designs that no human could paint consistently), but it is not sgraffito. There is no carving. The "design" is a flat layer of pigment.
You can spot printed underglaze by looking at the surface under a strong raking light. Real sgraffito will show the carved groove catching the light at certain angles. Printed underglaze is flat — the color changes are level with the surface, not below it. Also, run a thumbnail over the design. If the thumbnail catches on the edge of a line, it is carved. If the thumbnail just slides over, it is printed.
The honest version of this product is a printed dinnerware set with a sgraffito-style design, sold at a printed-dinnerware price. The dishonest version is the same set sold with "hand-carved sgraffito" in the product title for three times the price.
Knockoff #3 — Slip-trailer imitating a carved line
This one is a craft fair find. A slip trailer is a syringe-like tool that extrudes a thin line of liquid slip onto a clay surface. The line is raised, not carved. A potter who is good with a slip trailer can produce a design that looks like sgraffito at first glance, especially if the line is then pressed flat with a brush or the piece isleather-hard when the slip is applied so the new slip bonds to the body.
The tell is the line profile. Sgraffito lines are grooves — the surface dips down where the line is. Slip-trailed lines are ridges — the surface rises up where the line is. Run a thumbnail sideways across a sgraffito line and the line is lower than the surface around it. Run a thumbnail sideways across a slip-trailed line and the line is higher.
There is nothing wrong with slip trailing as a technique. It is a legitimate surface decoration. The problem is only when the finished piece is sold as sgraffito. The two are different crafts with different price points and different levels of labor.
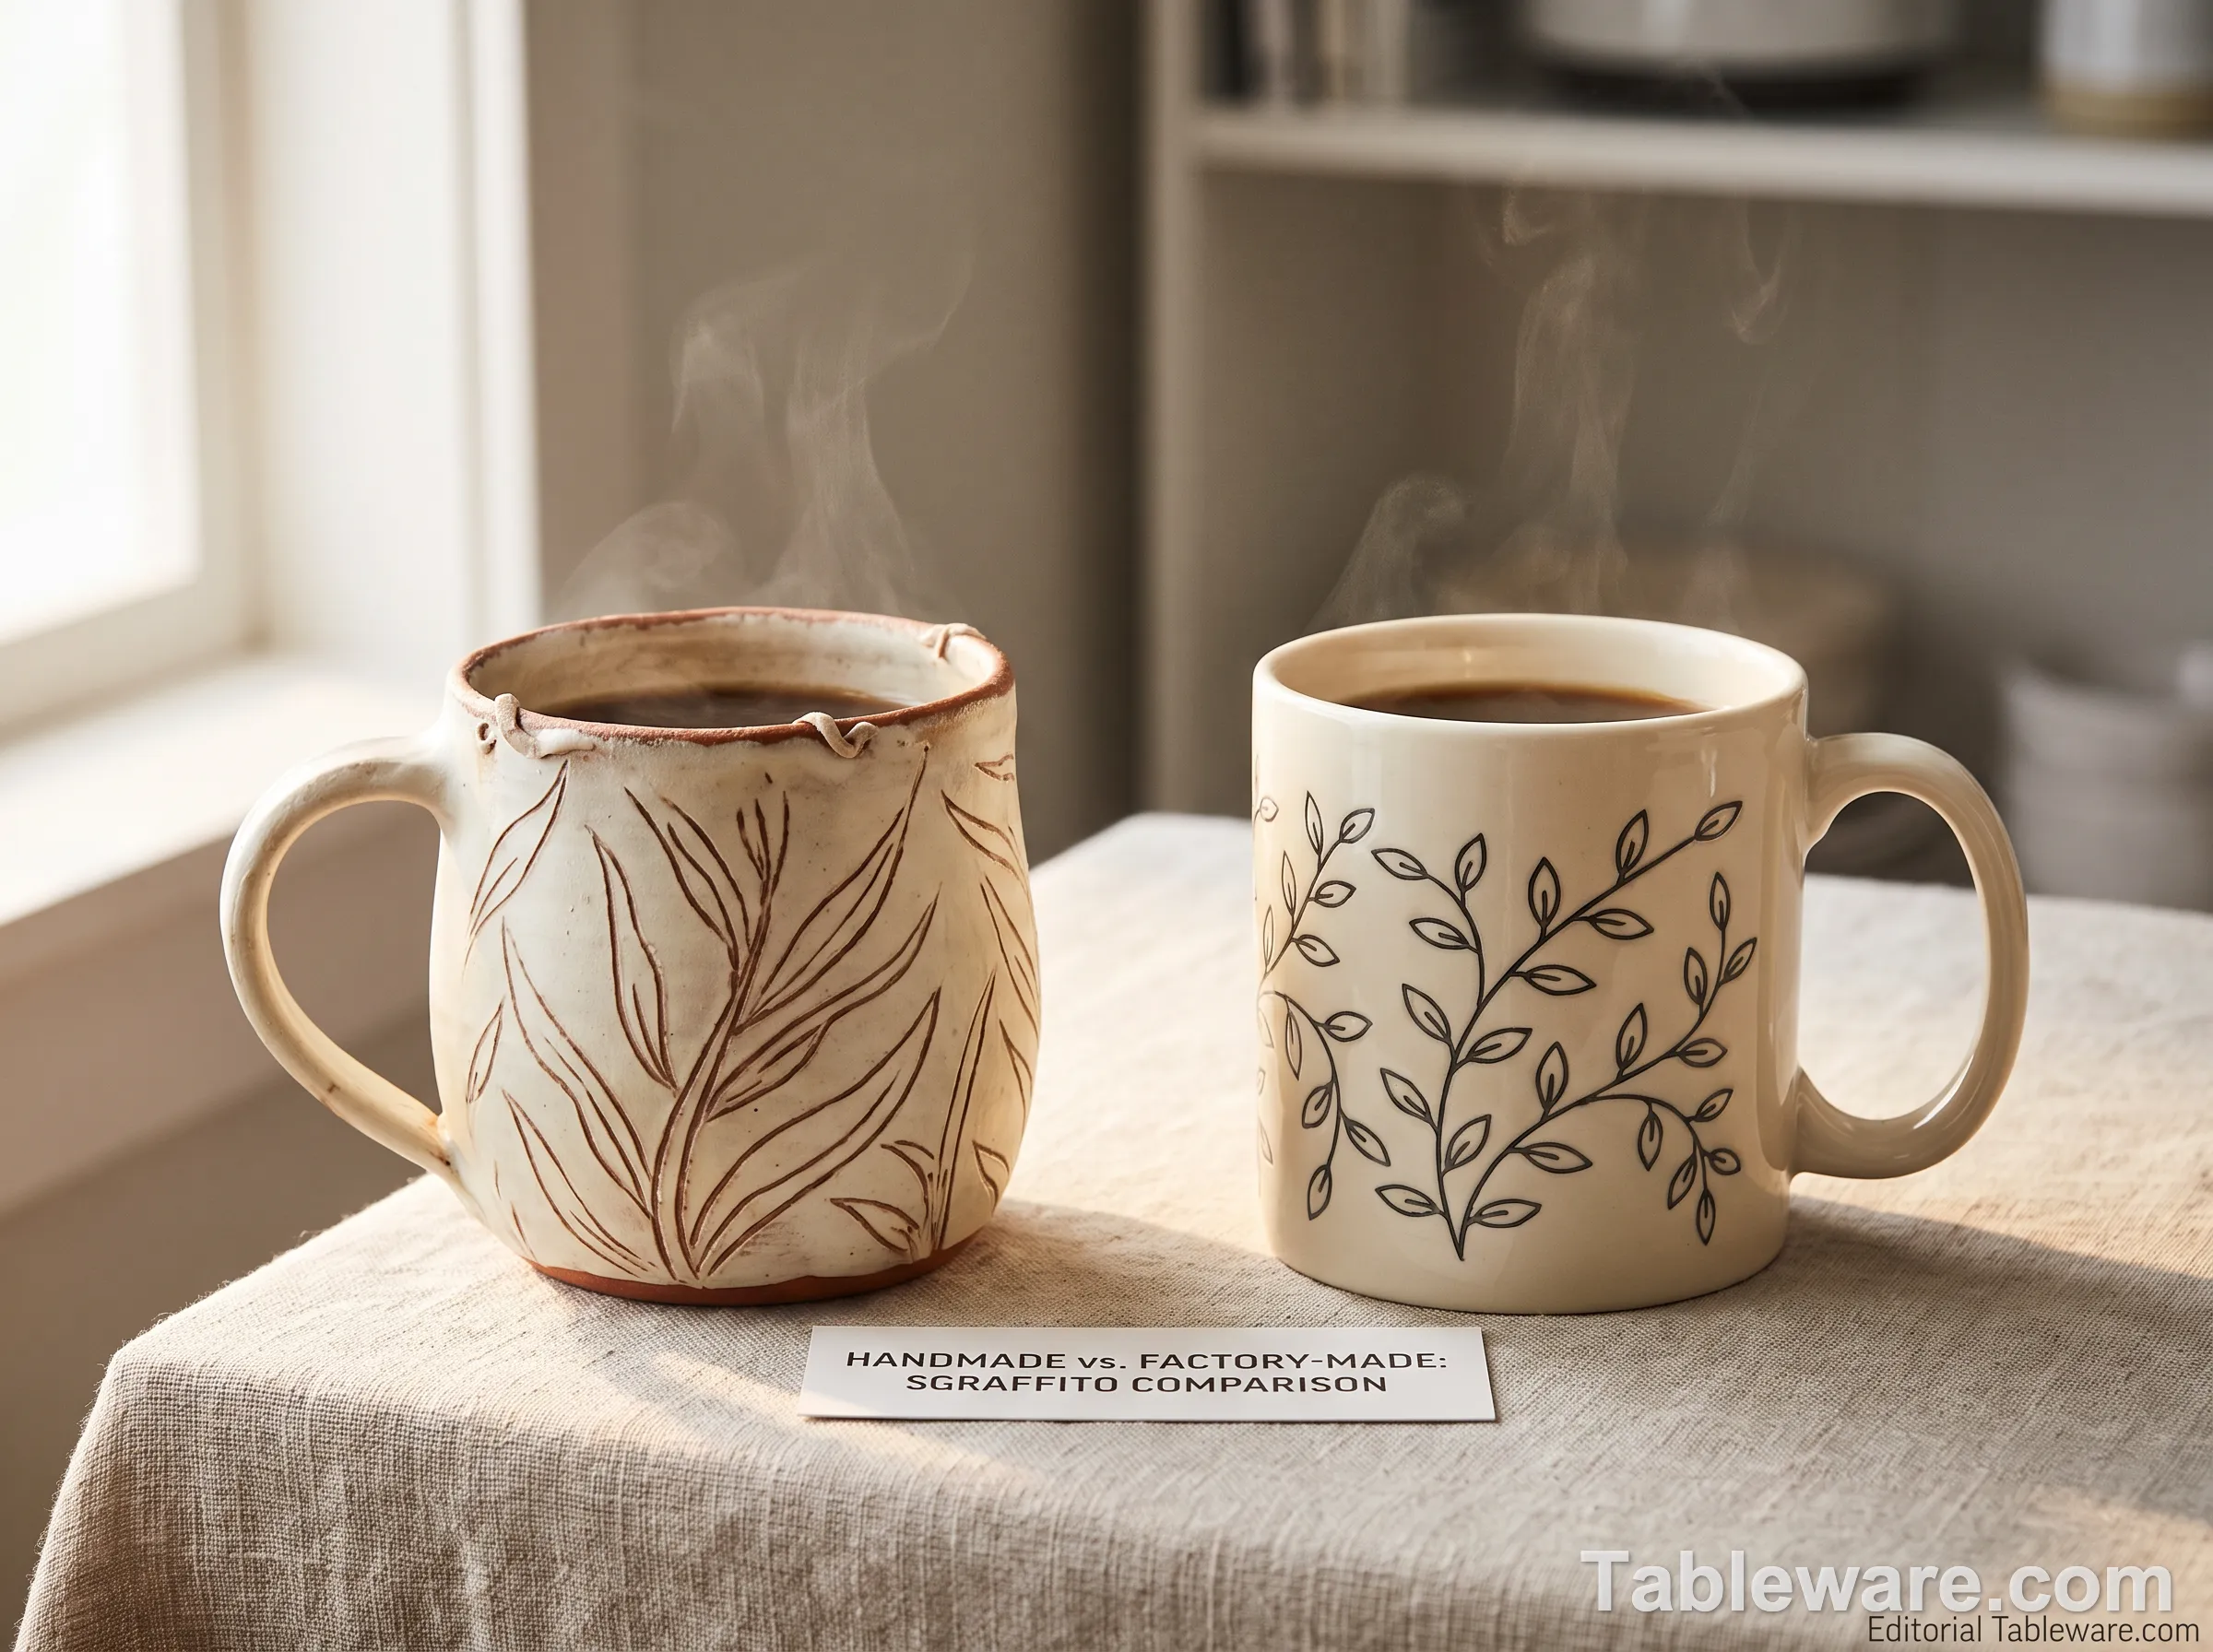
Fig 3. The visual gap, on the same table, under the same light. The left mug has line variation, a slight tremor, a real carved groove you can feel with a thumbnail. The right mug has mechanically perfect lines that are all the same depth and end in a clean square stop. Same general idea. Very different objects.
Sgraffito vs Mishima, Engobe, and Plain Carving
Now that we have knocked off the fake sgraffito, let's clean up the confusion with the real neighboring techniques. I get asked about mishima and engobe more than any other two.
Sgraffito vs Mishima: the inlay difference
Mishima is a Korean technique, named after a Korean island, and it is essentially sgraffito run in reverse. Instead of cutting through a slip layer to reveal the body beneath, you incise lines into the bare clay body, then fill those lines with contrasting slip, then scrape the surface clean so only the slip inside the lines remains. The result is a design where the color sits in the groove instead of being absent from it.
Visually, the two techniques can produce similar-looking pieces — a dark line on a light background, or a light line on a dark background. The structural difference is the relief. A sgraffito line is a groove cut into a layer. A mishima line is a fill sitting in a groove. If you run a thumbnail across a sgraffito line, the surface dips. Across a mishima line, the surface is essentially level — the slip inlay has been scraped flush with the surrounding clay body.
The two techniques are also often combined. A potter might sgraffito a botanical outline, then inlay the outline with a contrasting slip mishima-style. The result is a piece that has both techniques visible in different parts of the design.
Engobe is the slip, sgraffito is the carving
Engobe is a general term for a colored slip applied to a clay body before firing. It is what the slip layer in sgraffito actually is. Sgraffito without engobe is just carving. Engobe without sgraffito is just a colored slip coating. The two are not competing techniques; one is a sub-technique of the other.
Where people get confused is when they see a piece with a colored slip coating and no carving, and they call it sgraffito because the slip is the most visible thing. That is an engobe piece, not a sgraffito piece. The carving is what makes it sgraffito.
Plain carving or etching is its own thing
Cutting a design into a single clay body with no slip layer — so the carved line is the same color as the surrounding surface, only distinguished by the change in texture and the way the line catches light — is a real surface decoration technique. It is just not sgraffito. Studio potters who do this often pair it with a glaze that breaks differently across the carved line, so the carving shows up as a textural change rather than a color change.
This is the easiest of the four to identify, because the carved line has no color contrast. If you are looking at a piece and the design is the same color as the background, you are looking at plain carving, not sgraffito.
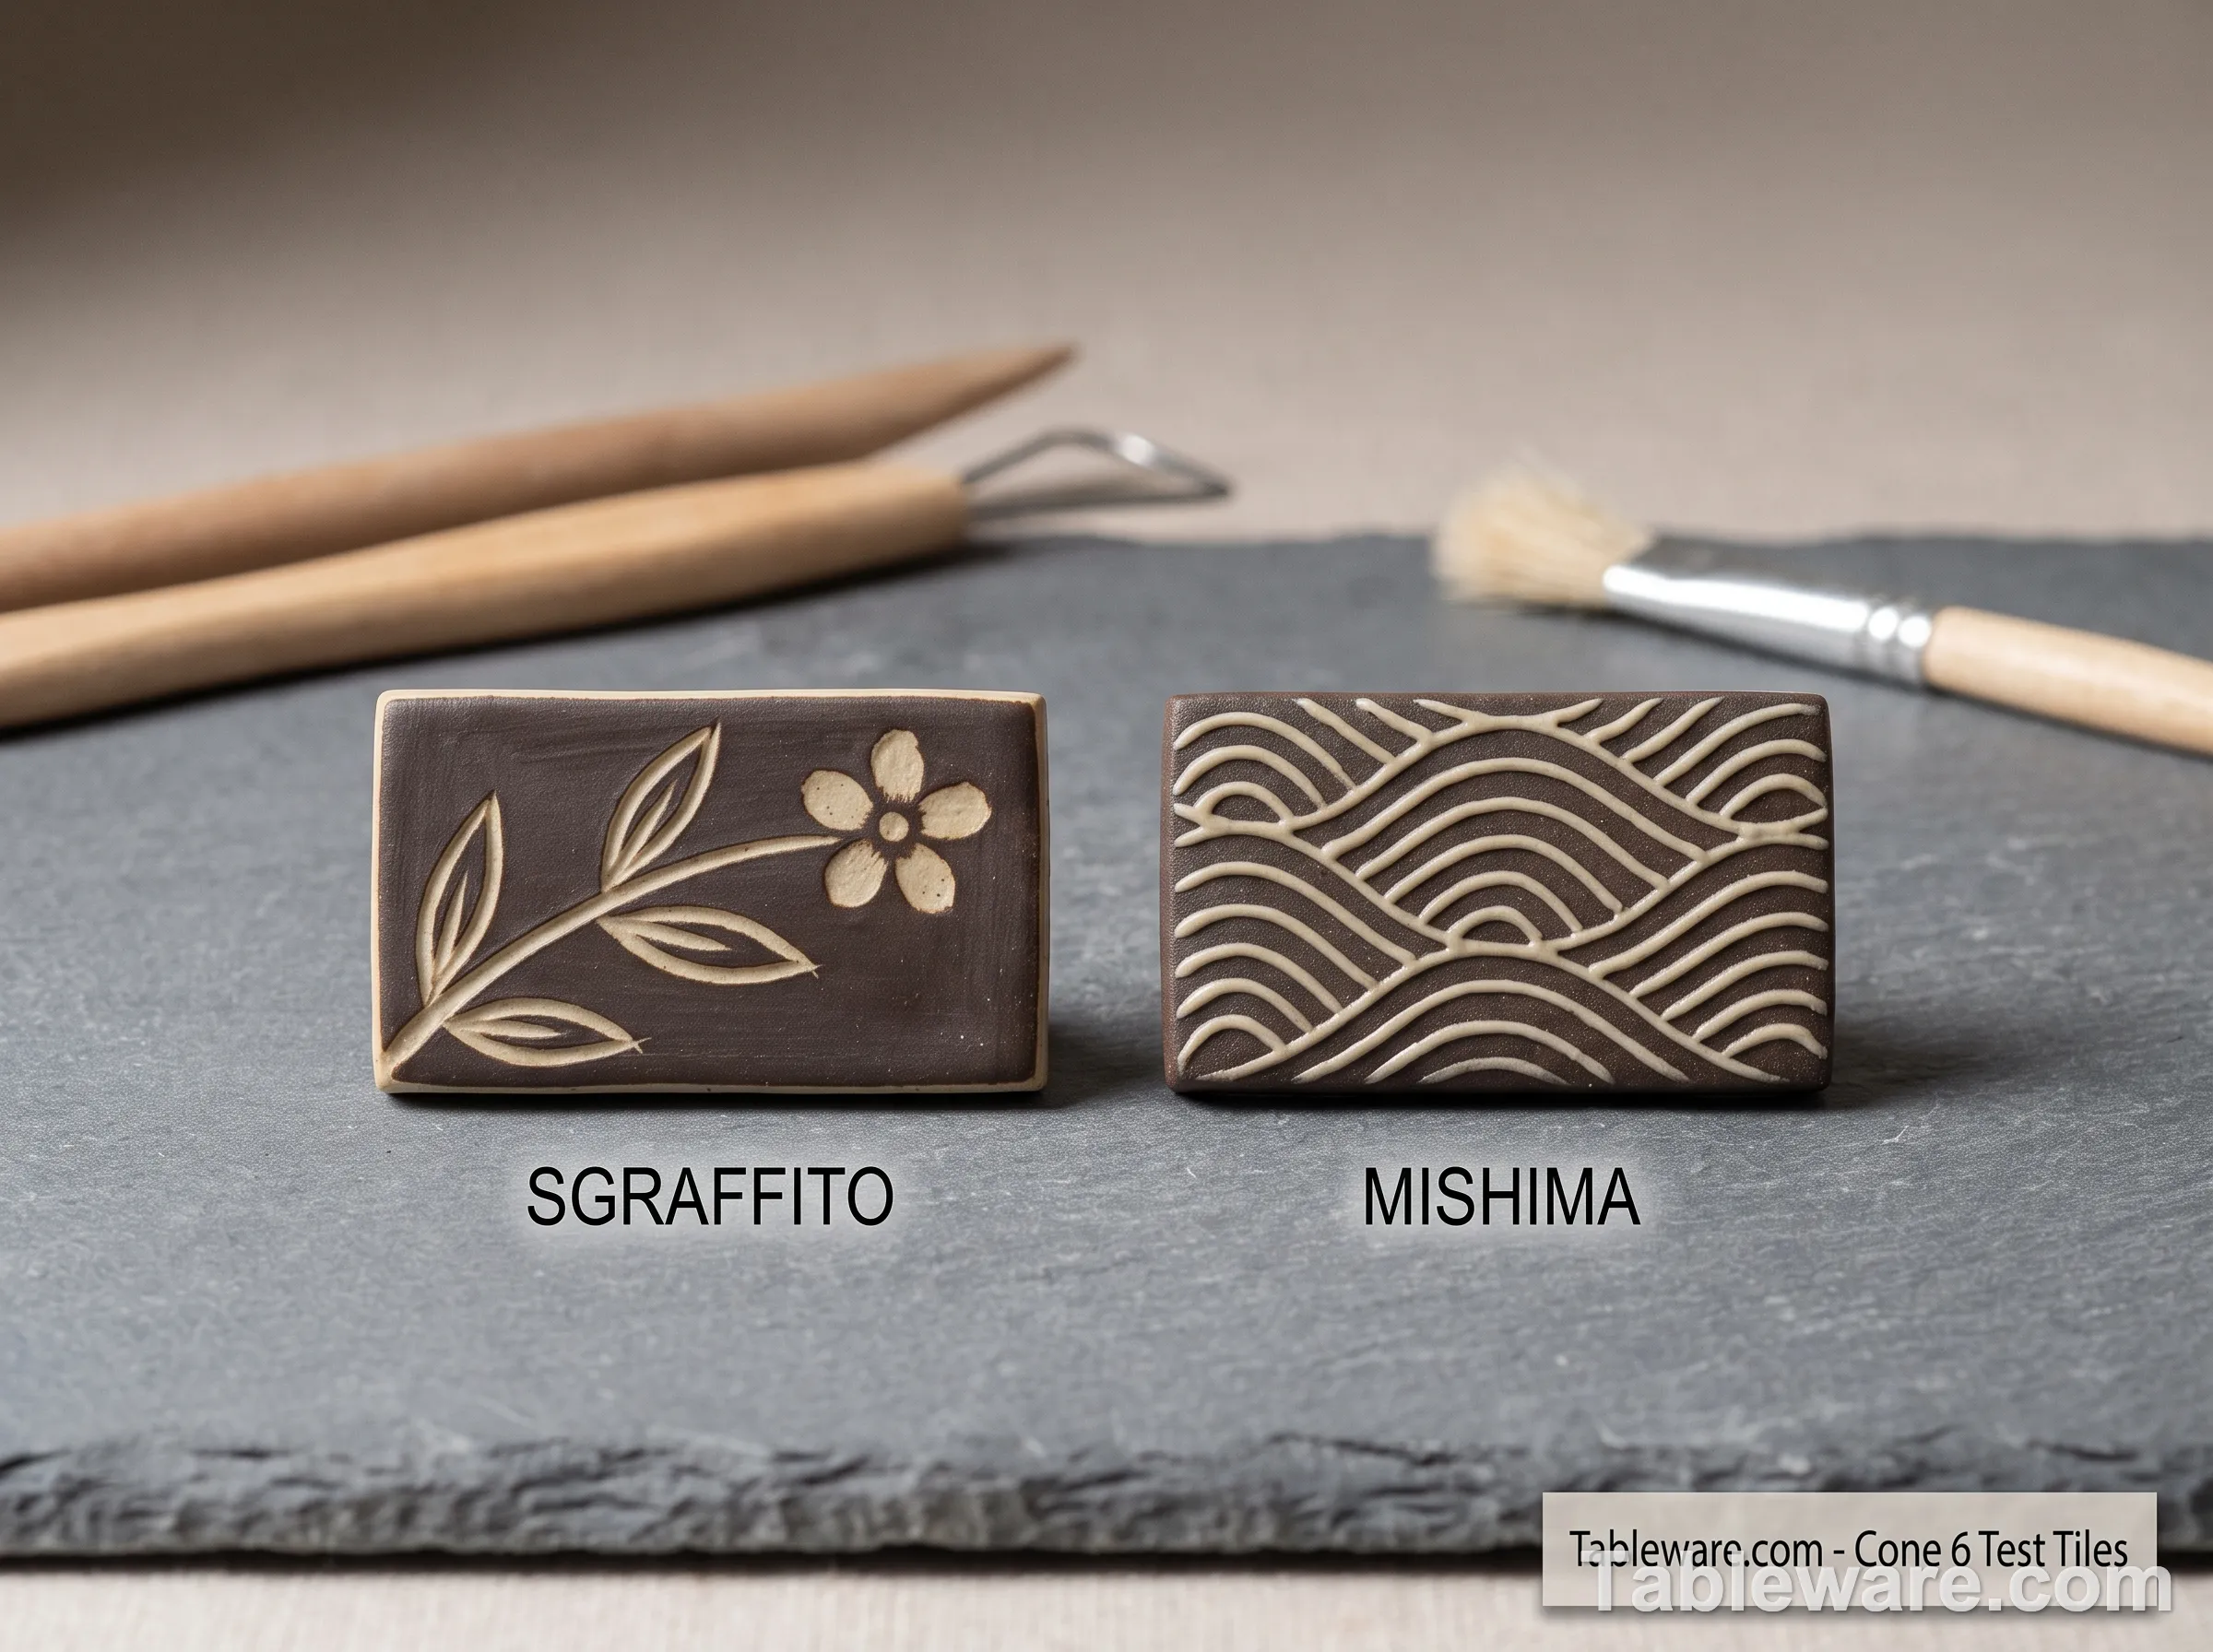
Fig 4. Sgraffito on the left, mishima on the right. Same general two-tone idea, opposite mechanics. The sgraffito tile has lines cut into the surface; the mishima tile has lines filled into the surface. Run a thumbnail across both and the difference is obvious.
Where to Find a Real Sgraffito Pottery Workshop Today
The good news is that real sgraffito is having a moment, and the people doing it are findable. Three rough buckets, in increasing order of accessibility.
The Pennsylvania redware tradition
The oldest continuous sgraffito tradition in the United States is in the Pennsylvania Dutch country — Lancaster, Berks, Lebanon counties — where German immigrant potters in the 18th and 19th centuries adapted the Italian sgraffito technique to local red earthenware clay. The result is a sgraffito with a warm red body and a white slip layer, often decorated with tulips, distelfinks (the stylized Pennsylvania Dutch bird), and fraktur-inspired lettering.
A few of the most established redware sgraffito potters in that tradition are still working. Pieces tend to be plates, jars, and the occasional large charger, with prices for a single plate in the $80 to $300 range depending on the size and the potter. If you are anywhere near Lancaster County, the local craft markets are worth a visit for this alone. If you are not, a small number of these potters ship and have Instagram accounts with regular process videos.
The redware sgraffito tradition is one of the closest living links to the Italian Renaissance original. Same colors, same basic technique, just translated from Tuscan earthenware to Pennsylvania clay.
The studio stoneware renaissance
The bigger and more accessible sgraffito scene is in the studio stoneware world. Hundreds of working ceramicists in the US, UK, and Europe do sgraffito as one of their primary surface techniques. Asheville, North Carolina is a particular cluster — the river district has at least a dozen studios with sgraffito in the regular rotation. The same is true in parts of Maine, the Pacific Northwest, and the UK studio pottery scene (look for "sgraffito" in the product tags at any of the bigger UK studio pottery sales).
Etsy is the easiest entry point, though the search results are noisy. The honest filter is to look for process photos and video. Any potter doing real sgraffito will have at least one process shot somewhere — the leather-hard piece, the stylus in hand, the slip curls. If the listing only has finished product photos and no process, the sgraffito claim is suspect.
Workshops and classes
Sgraffito is one of the easier pottery techniques to learn in a one-day workshop. The basic move — paint slip on a leather-hard tile, scratch a design through it — is teachable in an afternoon. Most community studios with a regular class schedule will run a sgraffito workshop at least once a year.
The workshops are also the best place to actually feel the difference between real sgraffito and the knockoff patterns. After about 20 minutes of carving with a stylus, your hand has built up enough muscle memory that you can spot machine-perfect line work on sight. The Etsy mug I mentioned earlier failed this test in about three seconds.
How to Spot Real Sgraffito When You Buy
A short checklist, in order of how fast you can run it.
The thumbnail test
Run a thumbnail sideways across the line. If the line is a groove, it is sgraffito. If the line is level with the surface, it is printed underglaze or a decal. If the line is a ridge, it is slip-trailed. The test takes about five seconds and catches 80% of the knockoff patterns.
The line-ending test
Look at where the lines end. Real sgraffito lines taper as the stylus lifts. Decal and laser-etched lines just stop. A square end to a carved line is the single most reliable tell that the line was not carved.
The repetition test
Look at the whole piece. Are the design elements exactly identical in size, position, and depth from one side of the piece to the other, or from one piece in a set to the next? Real sgraffito has variation. Decals and printed underglaze do not.
The back stamp and the kiln
Real studio sgraffito almost always has a maker's mark on the bottom — initials, a logo, a stamp. Mass-produced knockoffs sometimes have no mark, or have a generic "Stoneware" or "Made in China" stamp with no potter identified. The kiln also matters: real stoneware sgraffito is fired to cone 6 or higher, and the clay body will sound like a bell when flicked with a fingernail. Cheap earthenware knockoffs sound dull.
The price test
Real studio sgraffito is labor-intensive. A handmade sgraffito mug from a working potter in 2026 is going to be in the $30 to $80 range, and a dinner plate will be $60 to $200. If you are seeing a 12-piece sgraffito dinnerware set for under $150, that is mass-produced. It might still be a good-looking set, but the sgraffito claim is almost certainly printed.
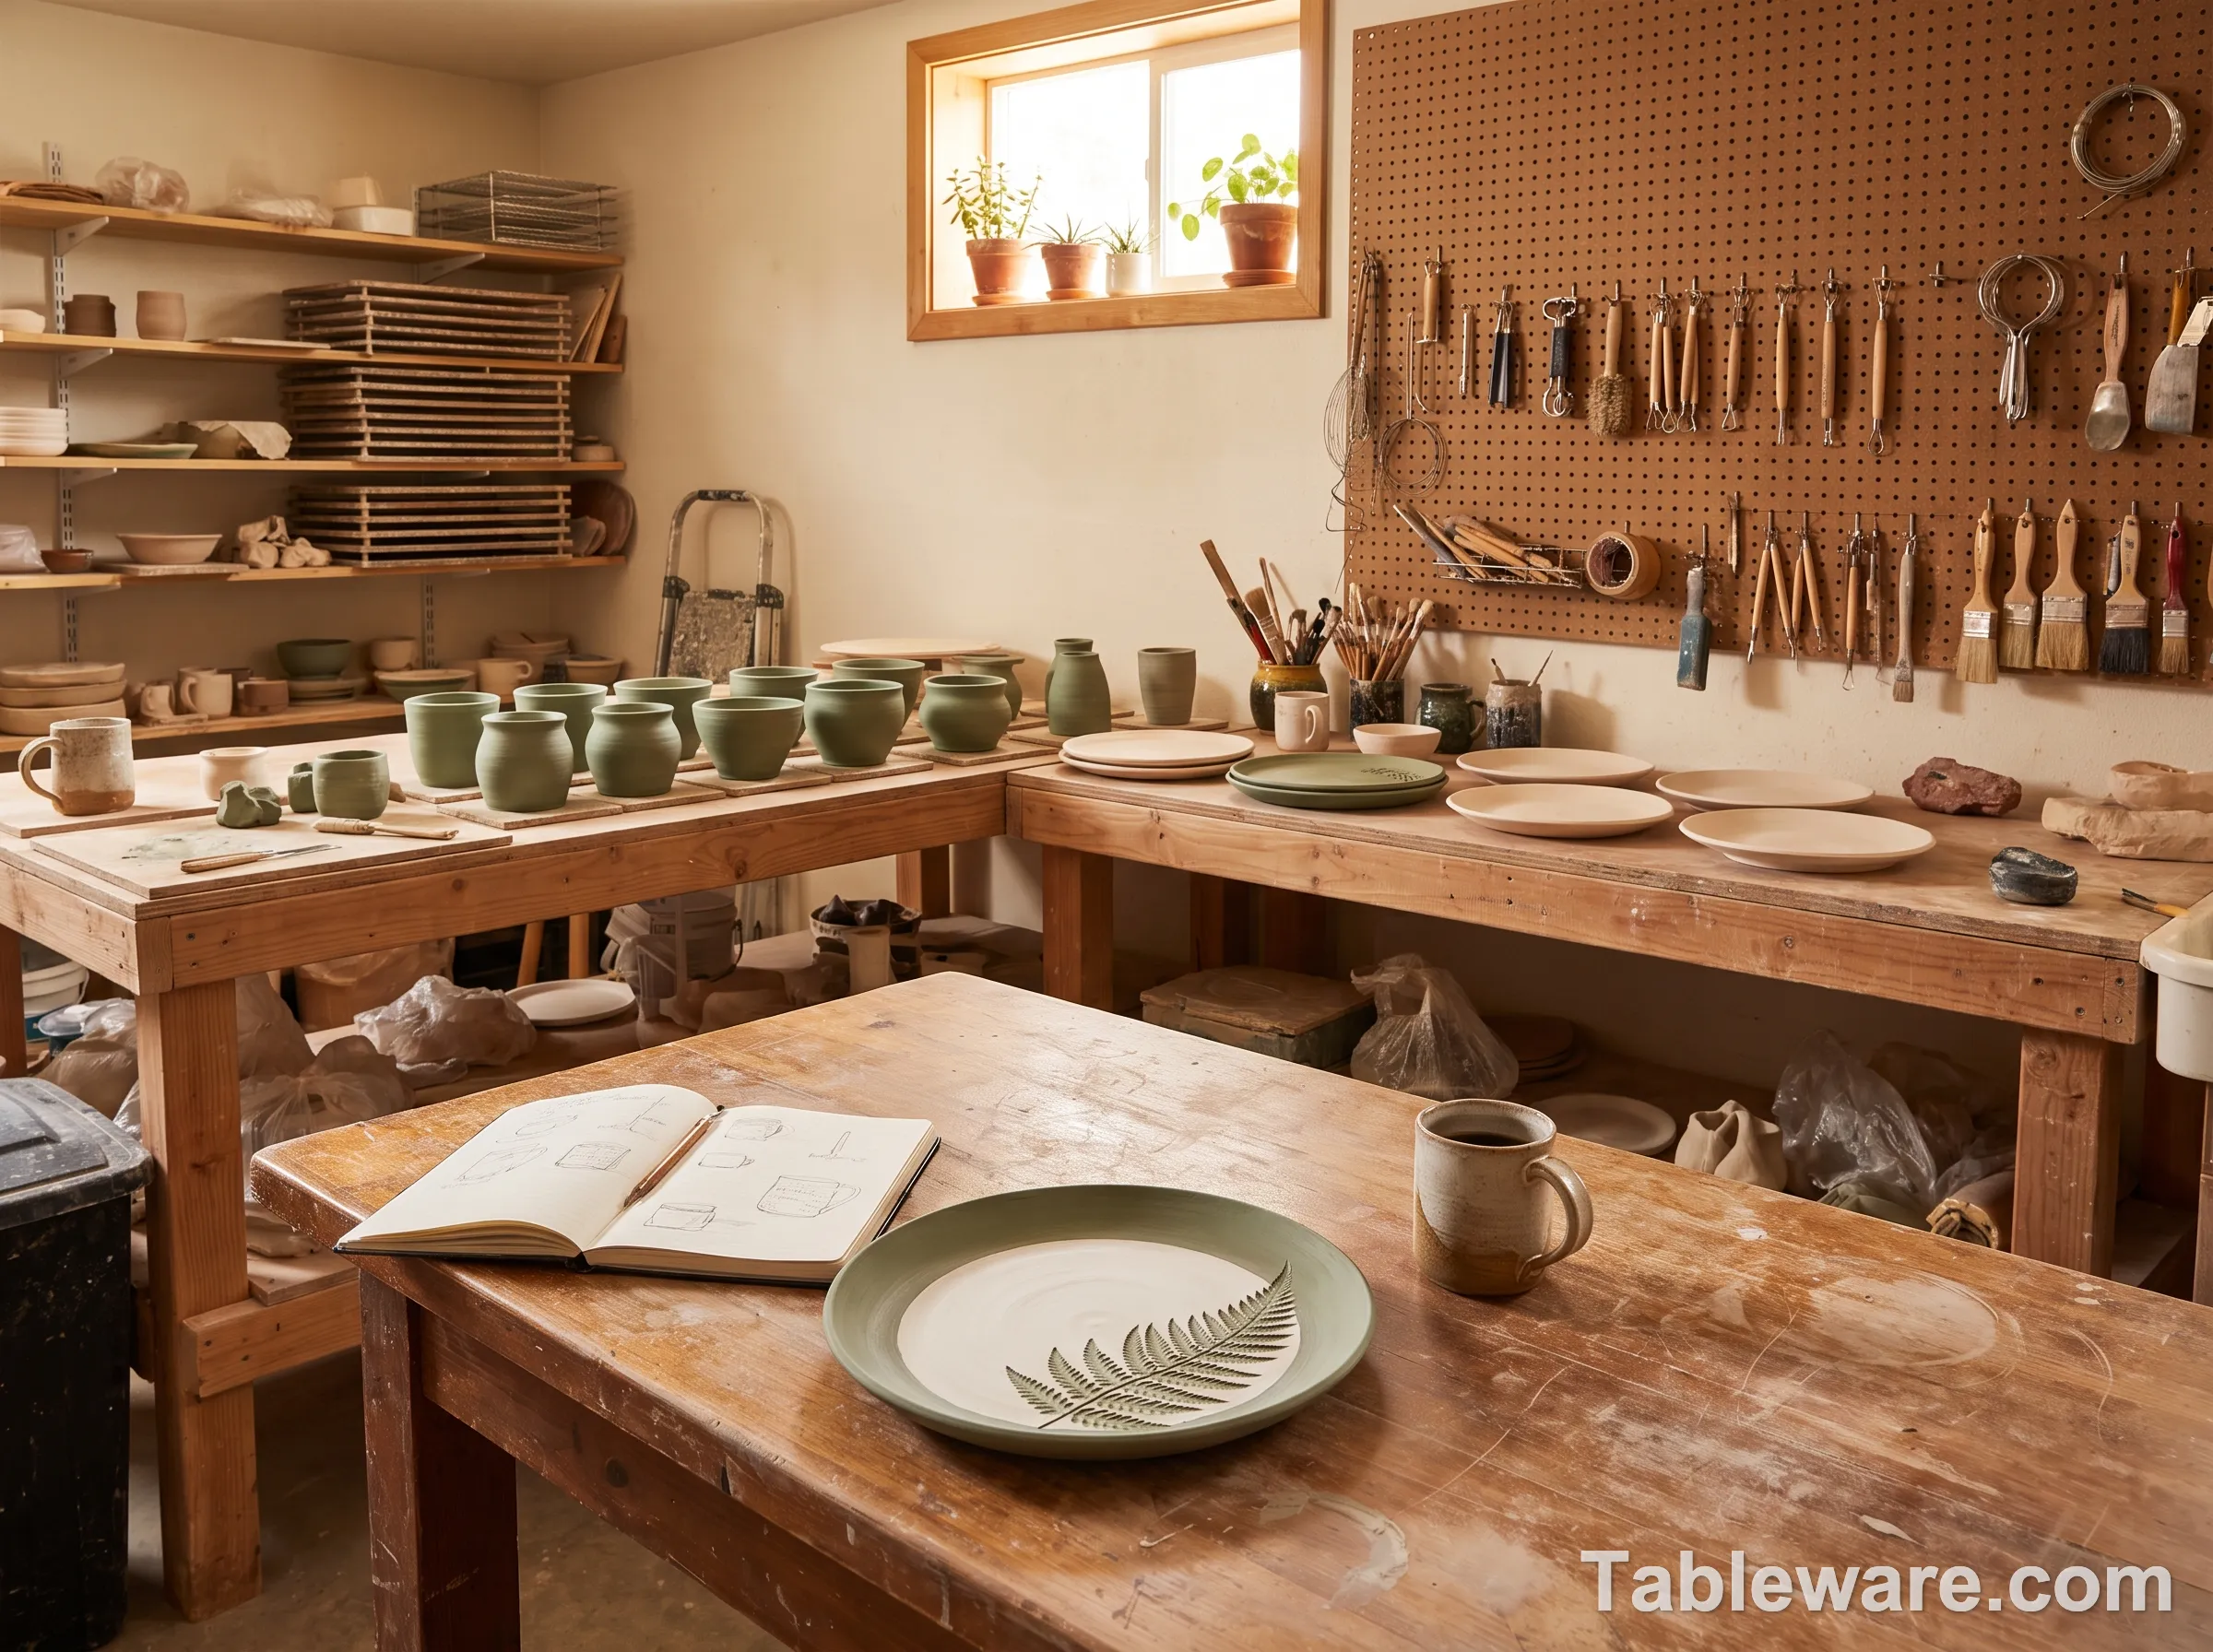
Fig 5. Where sgraffito actually happens. A working studio is messy, a little chaotic, and full of pieces in various stages of drying, carving, and bisquing. If the studio selling you sgraffito looks like a polished retail store, that is also a small tell.
A Short, Honest Summary
Sgraffito pottery is an 800-year-old technique where a potter carves through a colored slip layer to reveal the contrasting clay body beneath. The technique is one of the most approachable in studio ceramics, the modern revival is real, and the pieces being made today are some of the most interesting work in the studio pottery world.
The technique is also one of the most faked in the dinnerware market, because the finished product photographs well and the word "sgraffito" sells. The three knockoff patterns to watch for are laser-etched decals, printed underglaze, and slip-trailer imitations. None of these are dishonest techniques on their own — they are just not sgraffito, and they should not be sold as sgraffito.
If you want to buy real sgraffito, buy from a working potter with a visible process, expect to pay studio pottery prices, and run the thumbnail test when the piece arrives. If you want to try making sgraffito yourself, take a one-day workshop at a local studio. It is one of those techniques that looks simple and is actually kind of difficult in the way all hand skills are — the difficulty is not in any single step, it is in getting all four steps to line up at the same time.
The mug I bought at the Asheville craft fair six years ago is still in my cabinet. The mug I bought on Etsy last year is in a closet. The line on the Etsy mug has not gotten any deeper. The line on the Asheville mug has gotten a little fuzzy from the dishwasher, but the carving is still there. I know which one was made by a person.